I'm an international teacher in Abu Dhabi. I am seeking new ways to support teachers. I am the face behind the Laney Lee science resources that you love!
Let me be real: I’ve taught middle school science in classrooms where chaos was the norm: behavior issues, no designated lab space, and not nearly enough time. The idea of pulling off a lab felt exhausting.
That’s exactly why I started creating science labs that are simple, engaging, and realistic for everyday classrooms.
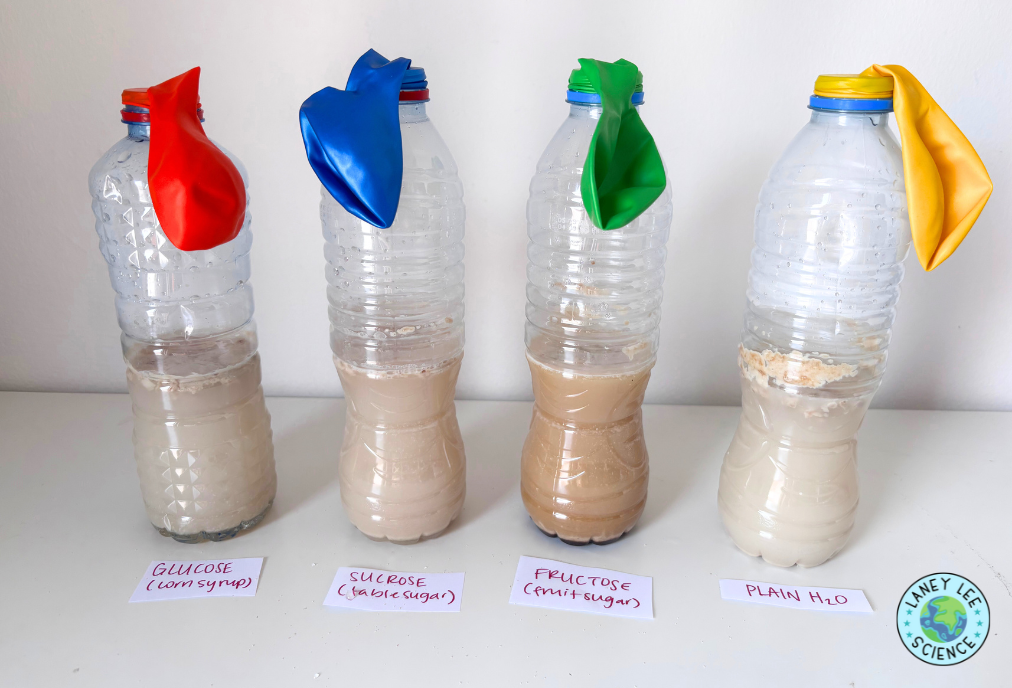
This Yeast Respiration Lab is a total win. It gives students a hands-on, low-stress way to explore how living organisms produce energy, while watching a balloon inflate in real time! Students investigate how yeast breaks down sugar, producing carbon dioxide gas that fills a balloon. Along the way, they discover the difference between aerobic and anaerobic respiration and see fermentation in action.
Not only does this activity connect beautifully to life science standards (hello, NGSS MS-LS1), it also gets students thinking like real scientists: making observations, collecting and graphing data, and drawing conclusions about cellular respiration.
And best of all? It’s teacher-friendly. Minimal prep. No fancy materials. And totally doable in a single class period.
Need the student worksheet that goes with this activity? Grab it here!
MATERIALS
5 clean plastic bottles (about 500 mL each)
5 balloons
5 packets dry yeast (7–10 g each)
Warm water (40–45 °C)
1 tablespoon each of: corn syrup (glucose), table sugar (sucrose), fruit sugar (fructose), and an artificial sweetener
Funnel
Stopwatch or timer
Ruler or string (for balloon circumference)
Marker for labeling bottles
Graph paper or a digital graphing tool
PROCEDURE SUMMARY
Prep the balloons. Label and measure the initial circumference of each balloon.
Set up the bottles. Fill each with 200 mL warm water and dissolve one tablespoon of a different sugar (or leave one as a control with plain water).
Add the yeast. Stretch the balloon over its matching bottle, then gently tip the yeast from the balloon into the bottle. Start the timer.
Watch and record. Measure balloon circumference at 5-minute intervals for at least 30 minutes.
Graph the results. Plot time on the x-axis and balloon circumference on the y-axis for each sugar type.
LANEY'S TIPS FOR SUCCESS
Be patient. If balloon inflation is slow after 5 minutes, keep going. In my trial, it took close to an hour to see the full effect.
Customize your variables. You don’t need all four sugar types. I tested only three and still got great data. Use what you have on hand.
Try a twist. Instead of testing different sugars, keep the sugar constant and experiment with different amounts of yeast to explore another variable.
CONCLUSION
By the end of this lab, students can literally see evidence of cellular respiration: carbon dioxide gas inflating their balloons! They’ll connect the dots between yeast fermentation and real-world processes like bread making and brewing, while practicing key science skills such as collecting data, graphing, and drawing conclusions. It’s an engaging, low-prep way to make a core life science concept come alive, balloon and all.