I'm an international teacher in Abu Dhabi. I am seeking new ways to support teachers. I am the face behind the Laney Lee science resources that you love!
Let me be real: I’ve taught middle school science in classrooms where chaos was the norm—behavior issues, no designated lab space, and not nearly enough time. The idea of pulling off a lab felt exhausting.
That’s exactly why I started creating science labs that are simple, engaging, and realistic for everyday classrooms.
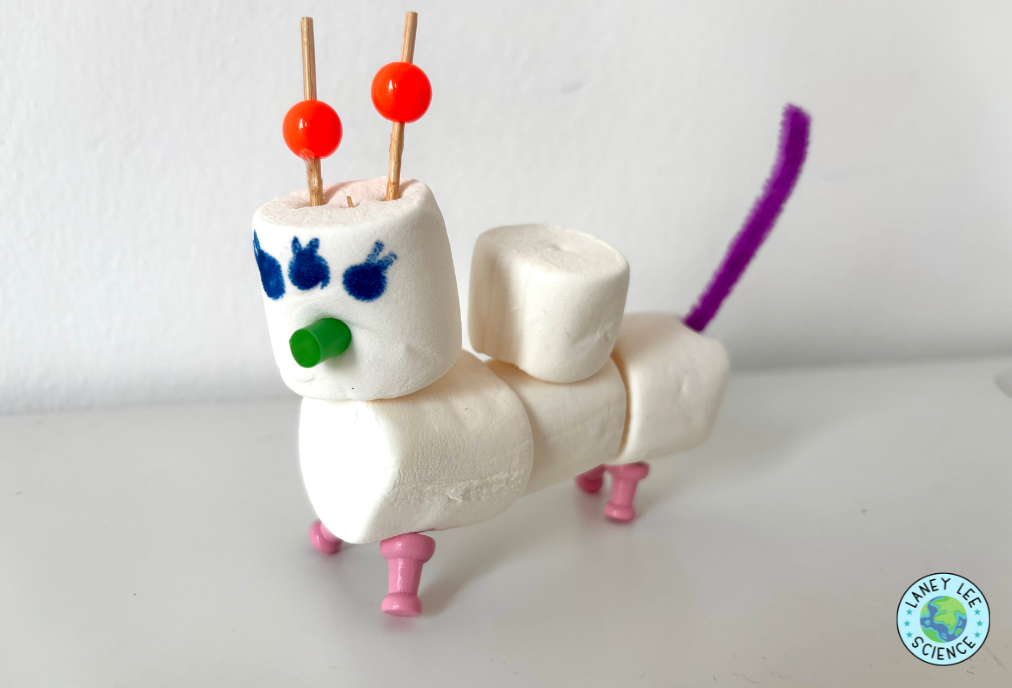
This Reebop offspring lab is a total win. It gives students a hands-on, low-stress way to model how traits are passed from parents to offspring using fun, craft-style materials like marshmallows, toothpicks, and gumdrops. Students predict, test, and literally build their own Reebop baby to explore genetics in action.
Not only does this activity connect beautifully to life science standards (hello, NGSS MS-LS3-1 and MS-LS3-2), it also gets students thinking like real scientists—making predictions, observing variation, and using key vocabulary like trait, allele, genotype, and phenotype to explain their results.
And best of all? It’s teacher-friendly. Minimal prep. No fancy materials. And totally doable over a couple of class periods.
Regular and decorative toothpicks (for body connections and antennae)
1 pipe cleaner (for the tail)
Gumdrops in multiple colors (for the nose)
Scissors, glue, and markers
Envelopes for allele storage
Procedure Summary
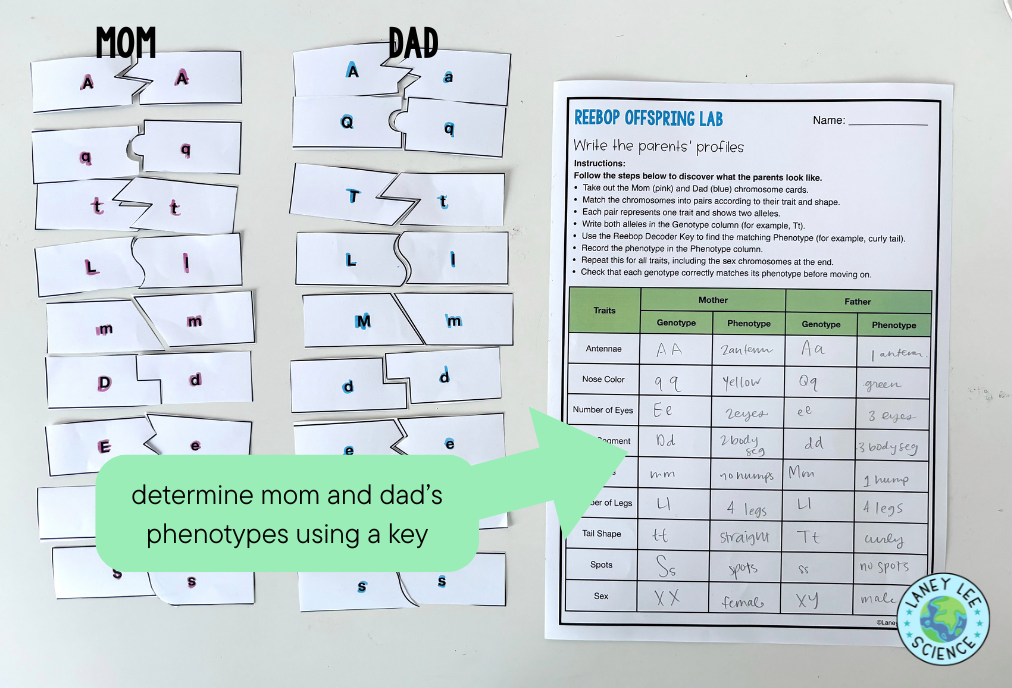
Step 1: Meet the Parents Students examine the “Mom” (pink chromosomes) and “Dad” (blue chromosomes), identify each genotype, and record the parent traits using the decoder key. (Sorry, you can see I missed the memo about the colored paper!)
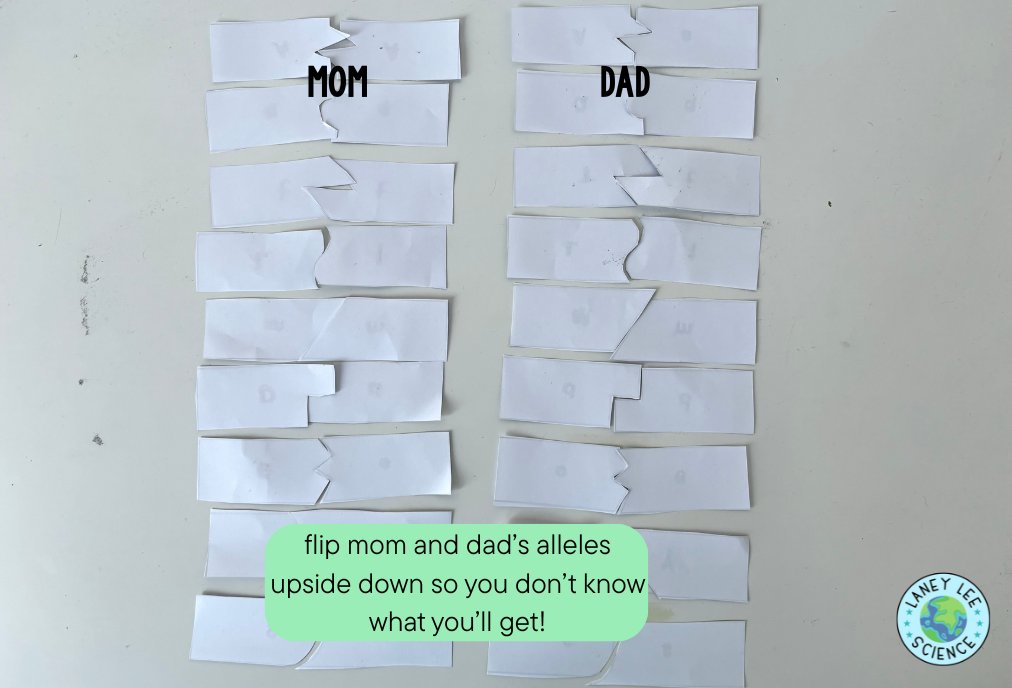
Step 2: Make Predictions They predict which traits their baby Reebop might inherit based on dominant and recessive allele combinations.
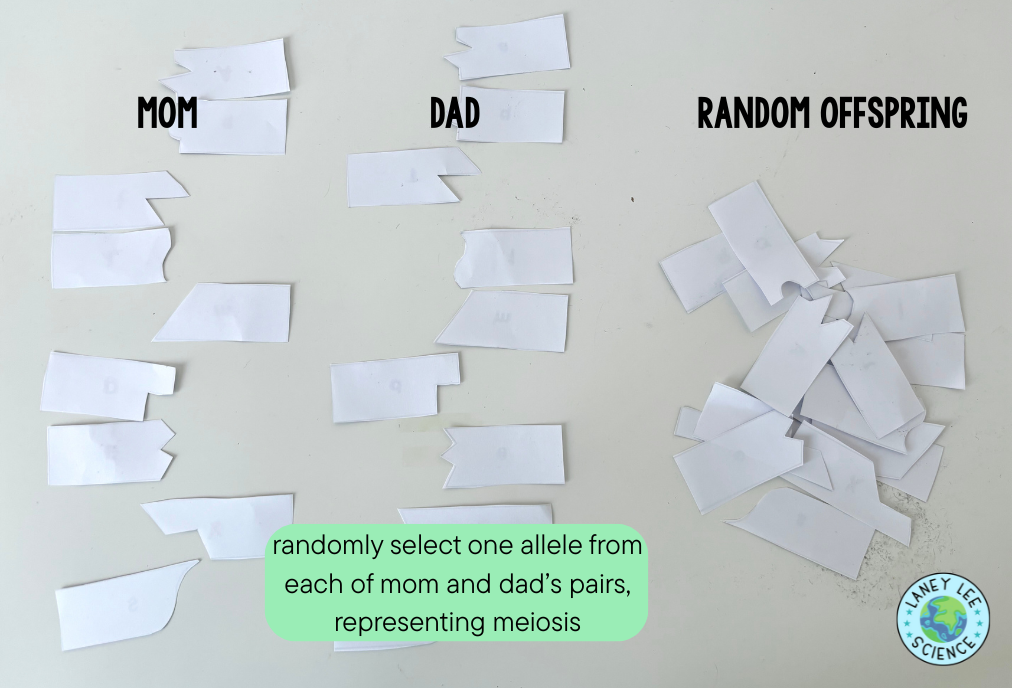
Step 3: Model Meiosis Students simulate meiosis by randomly selecting one allele from each parental chromosome pair, modeling how gametes form.
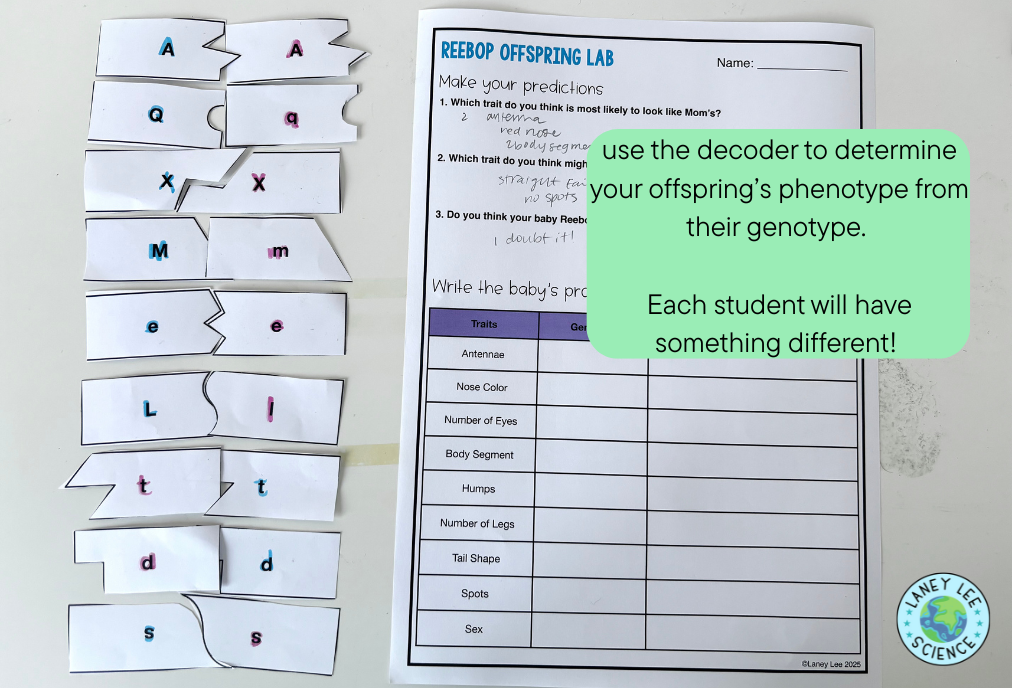
Step 4: Fertilization They combine the alleles from each parent to form the offspring’s genotype, then decode it into visible traits (phenotype).
Part 5: Build the Baby Reebop Using craft materials, students bring their Reebop to life, adding antennae, eyes, a tail, spots, and more depending on its genotype.
Part 6: Compare and Reflect All Reebops are displayed in a “nursery,” where students compare traits, note common and rare features, and discuss how genetic variation arises through meiosis and random fertilization.
Laney's tips for success
Withhold the parent pictures until students finish determining parental traits. This keeps the activity focused on genetics instead of guesswork.
Prep your materials ahead of time! Cutting out alleles can be tedious, so I recommend laminating one reusable set for the year.
Encourage students to use precise vocabulary (e.g., phenotype, not just appearance).
Create a class data chart to show how dominant vs. recessive traits appear in your Reebop population = instant real-world connection to genetics and probability.
Conclusion
The Reebop offspring lab is more than just a fun craft, it’s an unforgettable genetics simulation that brings Mendelian inheritance to life. Students leave understanding how traits pass from parents to offspring, why siblings look similar but not identical, and how alleles determine visible characteristics.
Whether you’re teaching heredity for the first time or looking for an interactive review before an assessment, this lab delivers engagement, understanding, and laughter all rolled into one marshmallow-based masterpiece.