I'm an international teacher in Abu Dhabi. I am seeking new ways to support teachers. I am the face behind the Laney Lee science resources that you love!
Let me be real: I’ve taught middle school science in classrooms where chaos was the norm—behavior issues, no designated lab space, and not nearly enough time. The idea of pulling off a lab felt exhausting.
That’s exactly why I started creating science labs that are simple, engaging, and realistic for everyday classrooms.
This separating mixtures lab is a total win. It hits so many key concepts: types of mixtures, solutions, solubility, and physical properties. And it’s packed with hands-on exploration. Students rotate through four stations where they physically separate real-world mixtures like sand and water, ink pigments, and saltwater.
Not only is this lab rooted in solid science content (hello, NGSS), but it also gets students thinking like scientists: observing, classifying, and figuring out how and why materials can be separated. It reinforces vocabulary that so often slips through the cracks: mixture, heterogeneous, homogeneous, solution, solute, solvent, dissolve, and solubility.
And best of all? It’s teacher-friendly. Minimal prep. Common materials. And totally doable in a single class period.
If you’re nervous about managing labs, I’ve got your back. I wrote this with you in mind. Keep reading to get all my tips and tricks for making this separating mixtures lab a smooth, exciting day for you and your students.
Need the student worksheet that goes with this lab? Grab it here!
MATERIAls list
Plastic cups
Water
Table salt
Sand
Dried beans
Iron filings or paper clips
Filter paper or coffee filters
Funnels
Magnets
White coffee filters or chromatography paper
Washable black marker
Stirring sticks or spoons
Binder clips or clothespins
Pipettes or droppers (optional)
Procedure summary
Station 1: Sand and Water (Filtration)
Students mix sand and water, then filter it through paper. They observe what stays behind and what passes through.
Station 2: Beans, Sand, and Iron Filings (Sorting & Magnetism)
Using their hands and a magnet, students separate the three components based on size and magnetic properties.
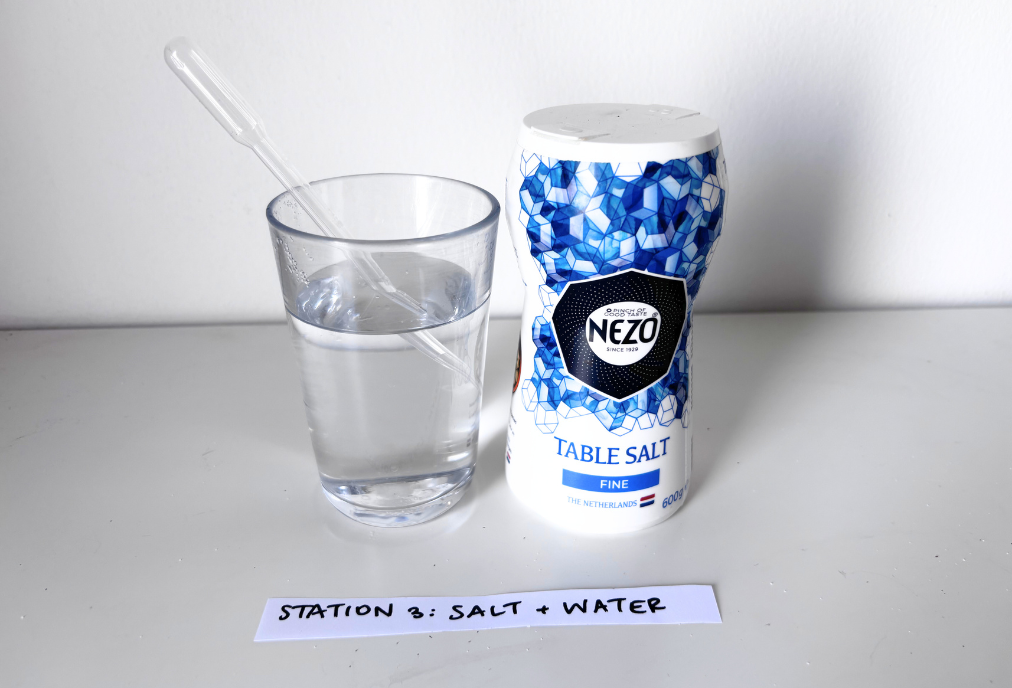
Station 3: Salt and Water (Evaporation)
Students dissolve salt in water and observe it evaporate (or see a pre-evaporated sample). A great way to discuss solubility and solutions.
Station 4: Ink Pigments (Chromatography)
Using coffee filters and water, students separate the components of black ink and discover that it’s actually made of several colors.
Laney’s Tips for Success
A funnel makes the sand-and-water station way less messy!
Some sand will cling to the bottom of the cup. Stir it well before pouring through the filter.
For the chromatography station, don’t hold the filter paper with your hand. Your arm will get tired! Use a binder clip or clothespin attached to a pencil across the cup.
Chromatography takes a few minutes. Consider limiting students to one trial, or prep them to be patient at this station. It’s worth the wait!
If you’re short on time, salt water evaporation can be shown with a pre-prepared dried sample.
Real-World Connections
Want to give this lab even more impact? Use my real-world context slides that show how separating mixtures is used in everyday life, nature, and industry. Think water purification, mining, cooking, recycling, even blood tests! This helps students see that this isn’t just a school activity, it’s science in action.
Final Thoughts
This separating mixtures lab is one of those rare lessons that checks all the boxes: it’s rigorous, it’s hands-on, and your students will actually remember it. Whether you’re teaching solutions, introducing matter, or just trying to keep the energy up before a break, this lab fits in beautifully.
It’s also a great way to sneak in NGSS-aligned science and engineering practices without overwhelming prep or expensive materials.
So go ahead, print the lab sheets, gather a few supplies, and get ready to enjoy one of the easiest wins in your science teaching toolkit.